


















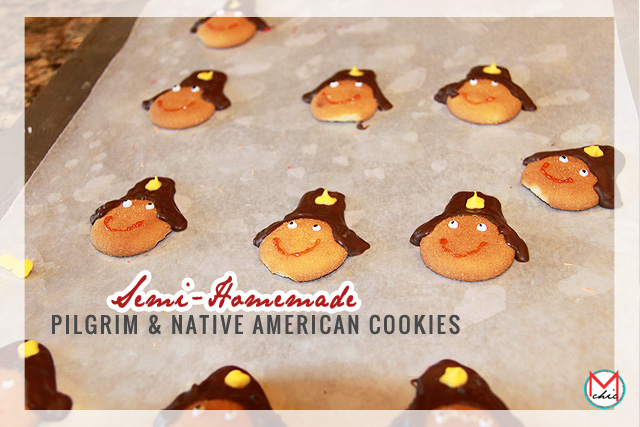
 [dropcap]N[/dropcap]ow that we have created beautiful Fall inspired mason jar candle holders, it’s time to move on to one of our favorite things to do for the holidays: baking. Inspired by Thanksgiving traditions, we have created these fun and easy, semi-homemade Pilgrim & Native American cookies. This is a perfect (and delicious) sweet treat to do for Thanksgiving dinner, a holiday party or as a fun baking DIY for you to do with children or friends. [tabs] [tab title=”What We’ll Need:” icon=”entypo-book”][/tab] [/tabs]
- Vanilla Wafers.
- Candy melts in chocolate, white, orange, yellow, and red
- Gummy worms (or your candy of preference)
- Small tube of white, black, orange (red icing optional).
- Sandwich Bags
- Glass containers (microwave safe)
- Silicon spatula.
- Wax paper
- Cookie sheet
- A picture of a pilgrim hat and Indian headband as guideline.
- How to Make the Figures:
[tabs] [tab title=”Directions” icon=”entypo-book”][/tab] [/tabs] Learn step by step how to make each of the figurines, and piece them together to create the Pilgrim and Indian cookies. Making The Pilgrims 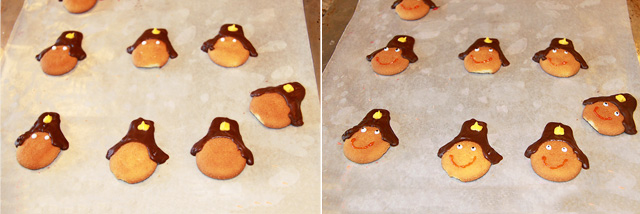
Put a few of the yellow candy melts in a microwave safe bowl and pop them in the microwave for about 1 minute. Stir with a spatula to completely melt the candy.
Have a sandwich bag handy to quickly pour in the melted candy. Make a very small cut on one of the tips of the bag to make a piping bag. Tip: Avoid making a large cut so you can have more control when you begin to pipe the cookies.
Start piping out small squares on a sheet of wax paper to begin making the small hat buckles. Set them aside and Leave them to harden completely. Once these are hardened, it’s time to move to the next step.
Line a cookie sheet with wax paper, and place the vanilla wafers in it in a row (3-4 per row).
Microwave a bowl of chocolate candy melts, and stir afterwards. Pour the melted candy in a homemade piping bag.
It is time to pipe out the pilgrim hats on the vanilla wafers one by one. Start by piping out a line over the top of the vanilla wafer and then outline the shape of the pilgrim hat, making sure to fill it in completely.
Now quickly place a yellow square we made earlier on the center of the pilgrim hat before it hardens. Try to work quickly as the candy melts will harden quite quickly. Tip: Have your a photo of the Pilgrim hat handy so you can use it as a guide.
Once all the pilgrim hats are created and hardened, we can move on to the eyes and mouth.
Taking white icing, create two dots for the eyes and then use black icing for the pupil. We then take orange (or red) icing and draw the mouth. Tip: Do not worry about making these perfect, as this adds to a warm, homemade touch.
Set the cookies aside until everything is hardened. When they’re ready, carefully pull them off the wax paper and lay them on a serving plate. And enjoy!
Making The Native Americans
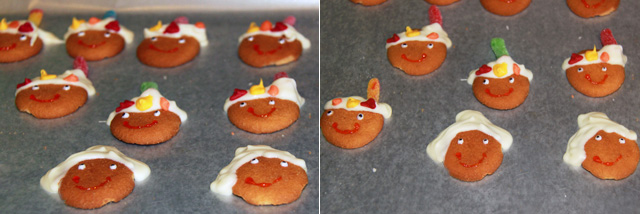
Open your bag of gummy worms and cut them in half (or to the appropriate size) to use as the feathers. Taking some icing or white candy melts that you’ve melted to attach the gummy to the front of the cookie. Leave it aside to harden a bit before moving on to the next step.
Melt the red, orange and yellow candy melts (in separate bowls) and pour them in piping bags. You should now have a red piping bag, a orange one, and so forth. On a wax paper, start to make squares, circles and triangles–interchanging between the colors. Set these aside so they can harden.
Now microwave some white candy melts. Again pour it in a piping bag and start to draw an indian headband on the top of the vanilla wafer. Quickly place a triangle, square and circle on the band to set it. Choose whatever pattern you’d like to design your headbands.
Next draw the eyes and mouth as you did for the pilgrims. Let the cookies set.
When the cookies are ready, carefully lift them and place them on a plate. And enjoy. Tip: For a lovely touch, you can use these cookies as cupcake toppers.